
The Easy Way to Paint Cabana Stripes
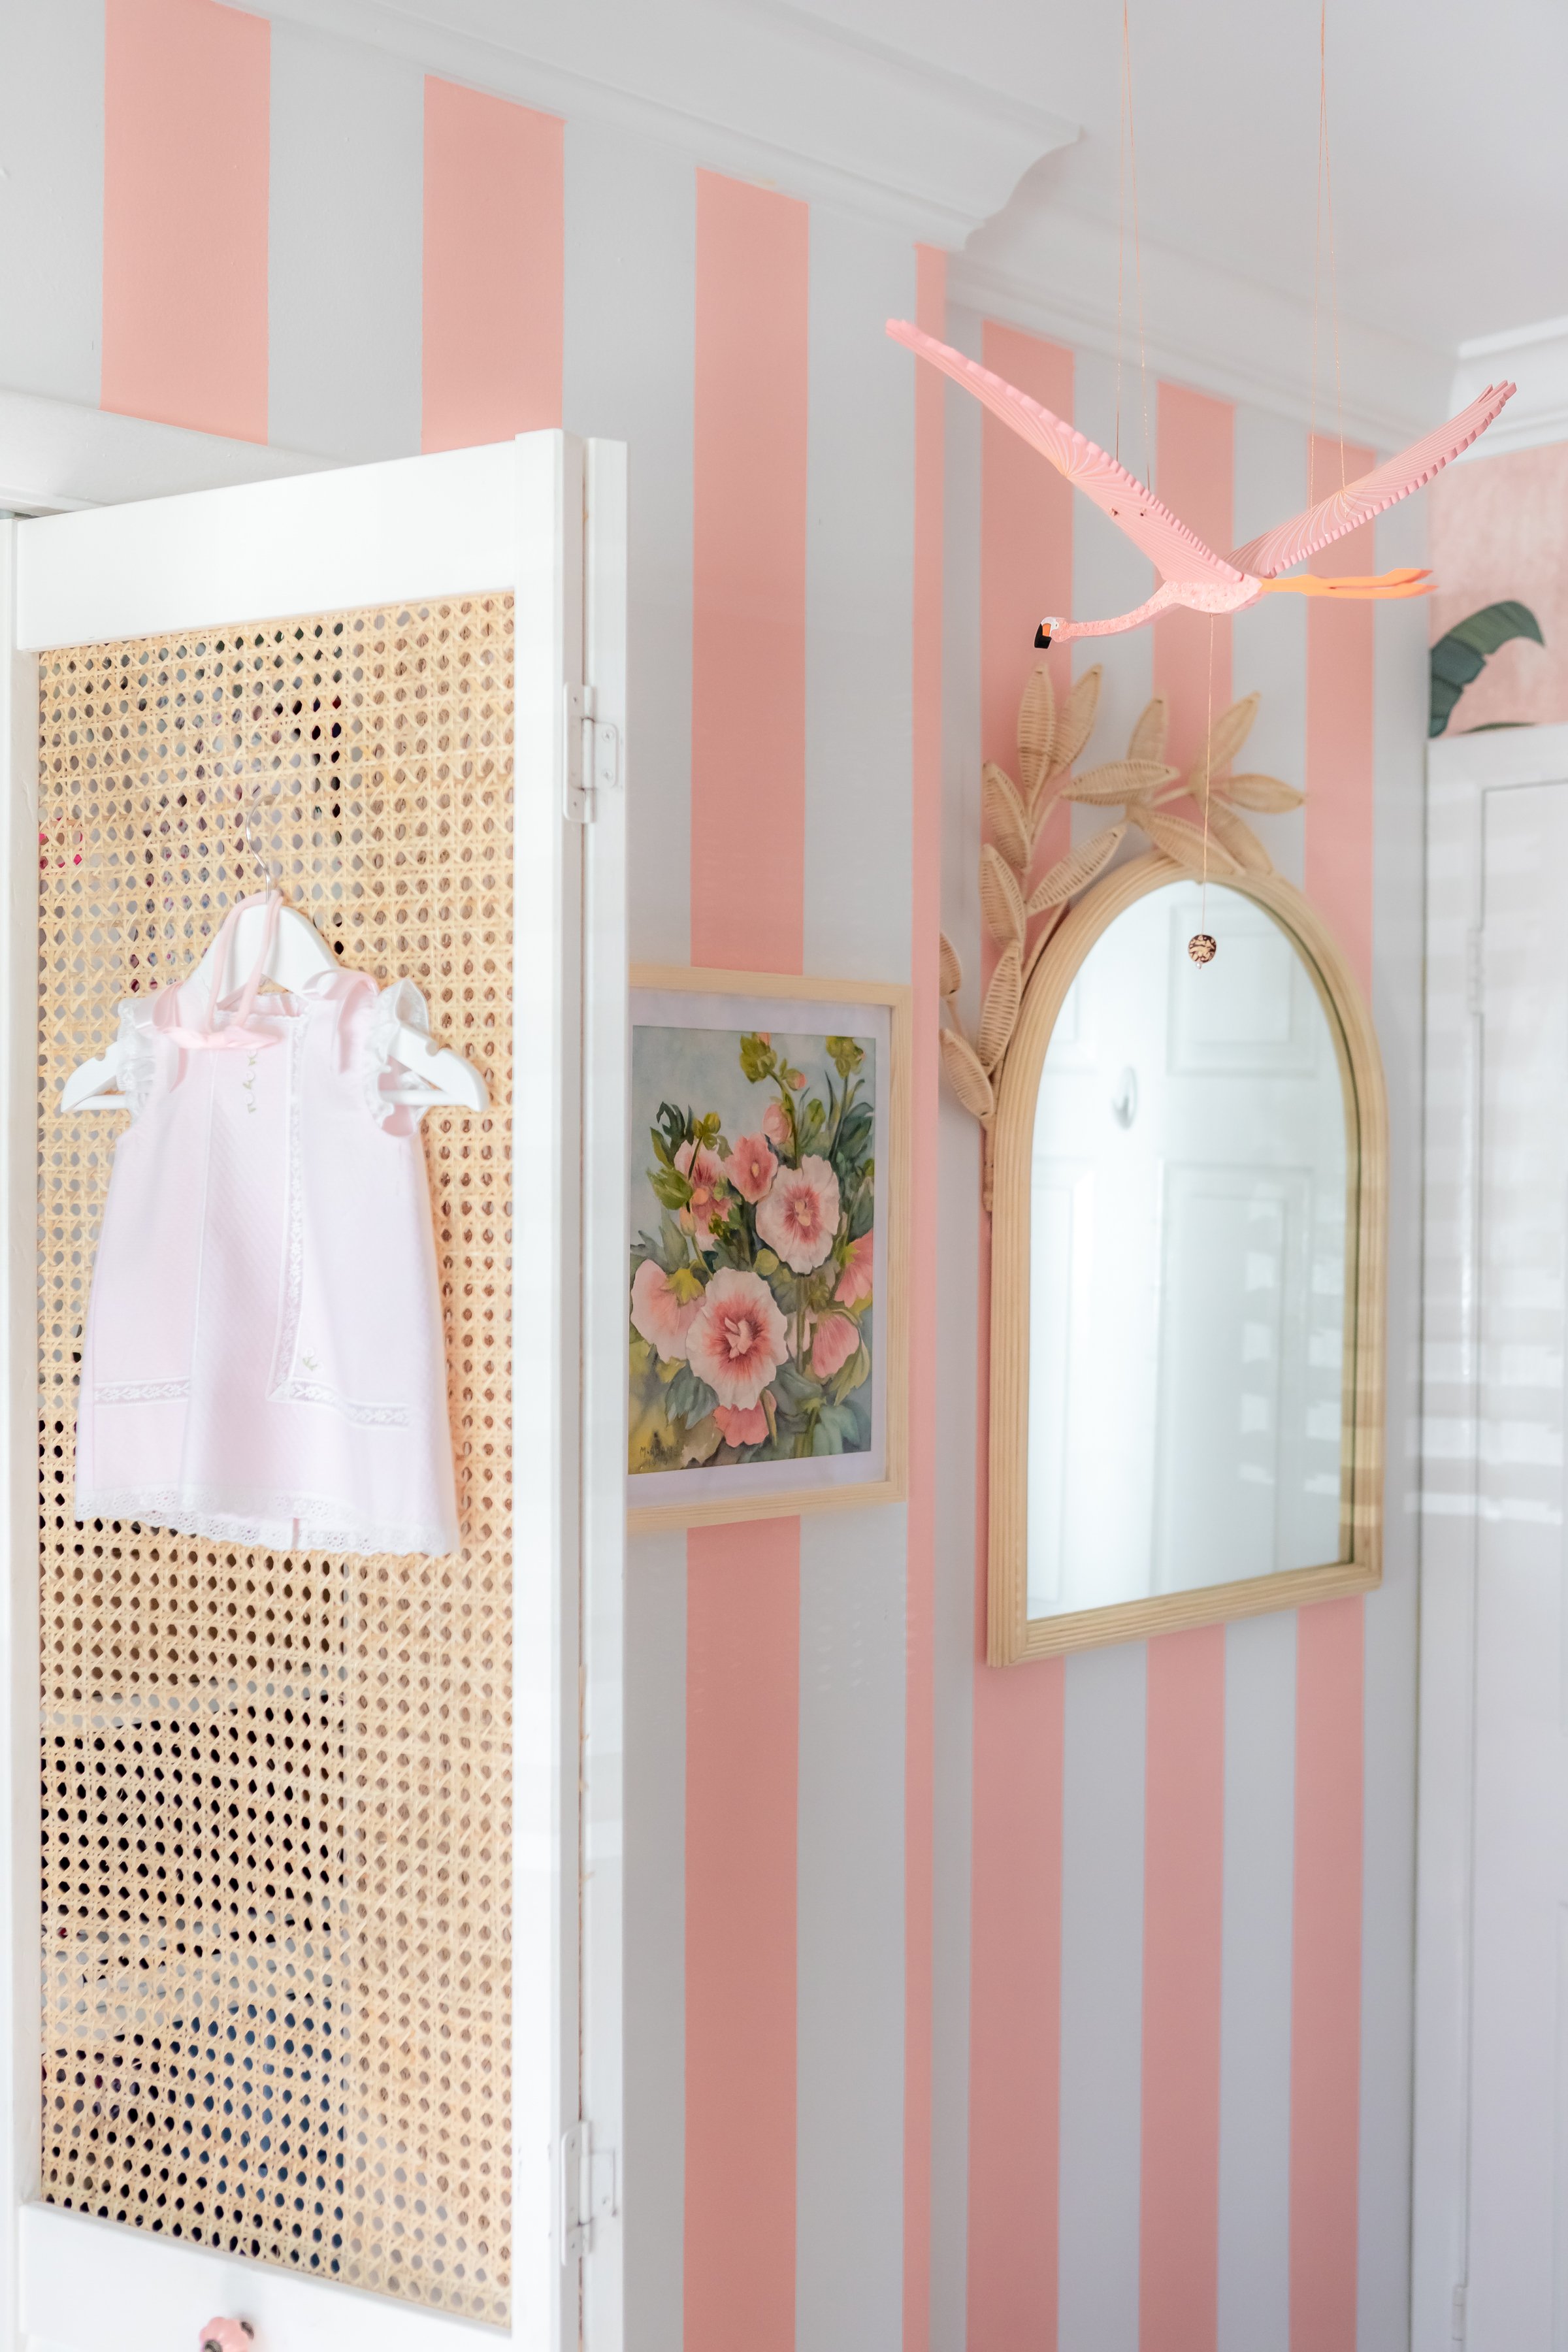
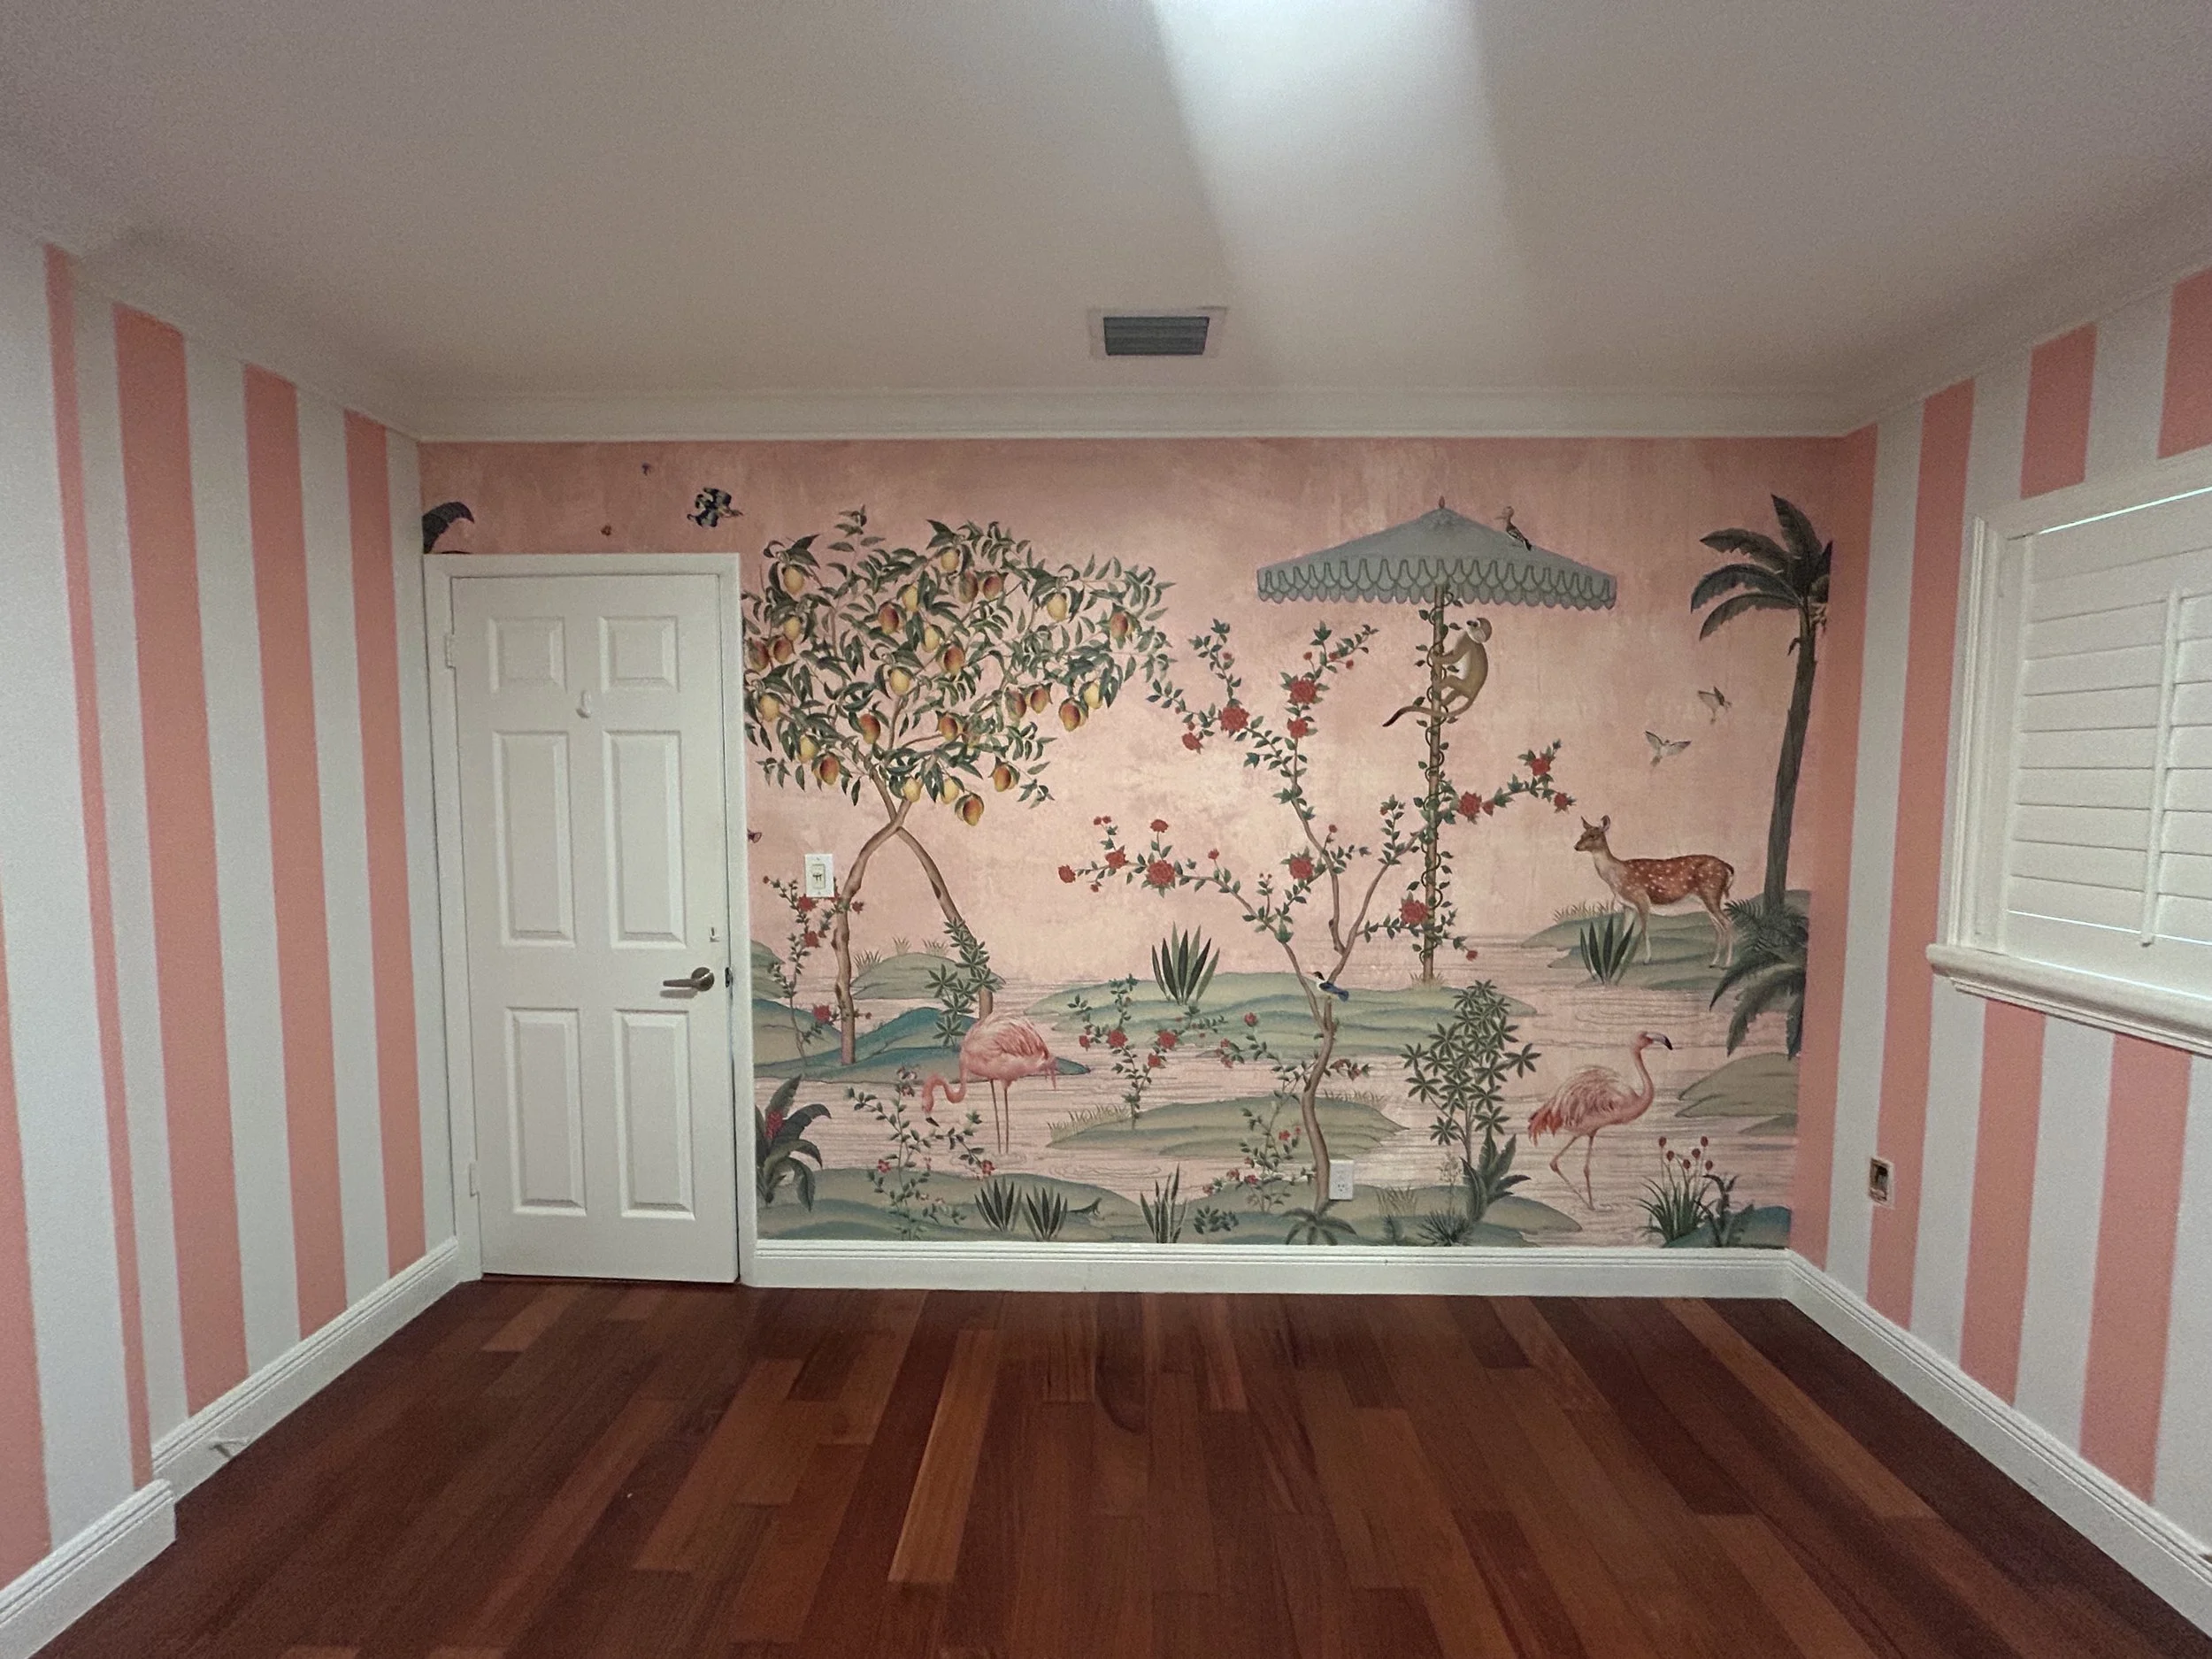
Once I committed to a Colony-inspired design for my daughter’s nursery, I knew cabana stripes had to be part of the room. I thought they could bring in color without overwhelming the space and give the room a feeling of effort and intention that plain paint never quite achieves. They would also pair beautifully with the natural textures throughout the room, especially with the cane closet doors that were already in place.
I added cabana stripes to three walls in the nursery. Keeping them to multiple walls helped the room feel cohesive, while still allowing the design to breathe. I reserved the only wall I had that didn’t have a window or closet for wallpaper. I think caning a wall from ceiling to floor across would be too much, anyway. The windows did a good job of breaking it up.
Why Five Inches Works
The stripes are five inches coral and five inches white.
Stripe width matters to achieve the look you want. Smaller stripes tend to feel busier and more decorative, especially once furniture, art, and lighting are layered in. Wider stripes can start to feel heavy or overly graphic.
Five inches landed in the middle. Bold enough to read as intentional, but soft enough to live with every day.
Paint Details
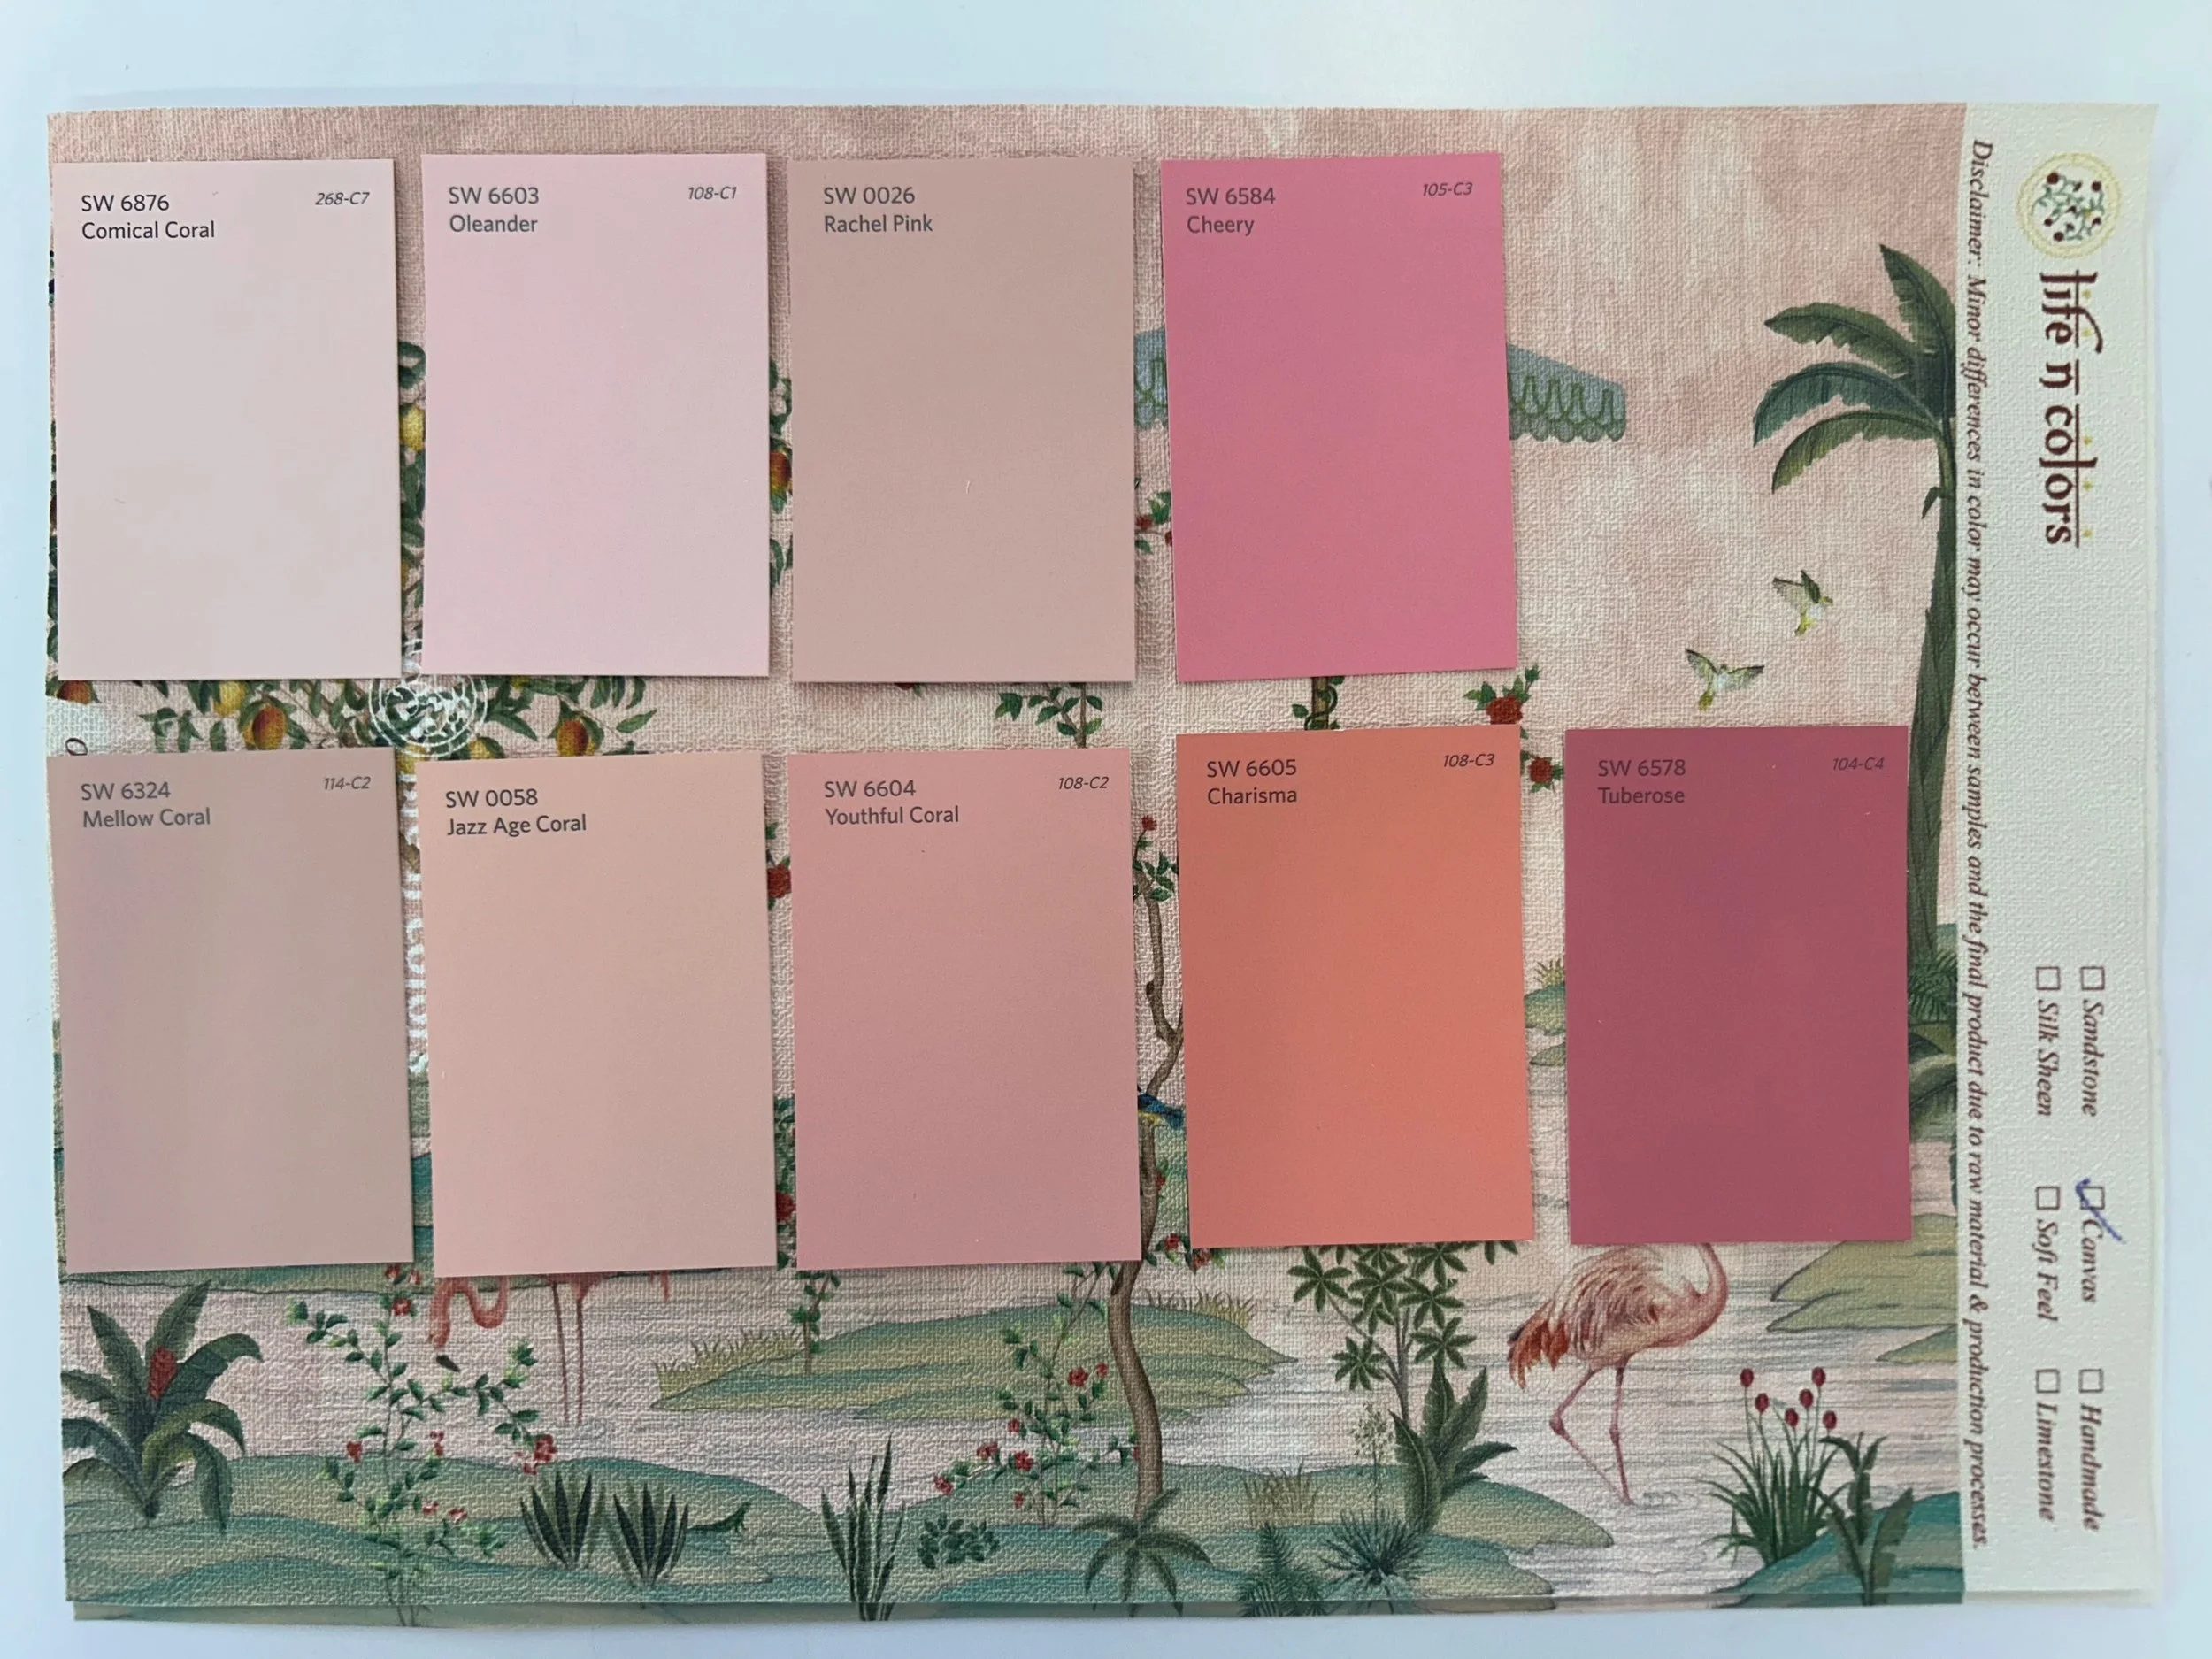
Color: Sherwin-Williams Youthful Coral
Finish: Satin
Coats: Two
Dry time between coats: About one hour
I painted the white first and treated it as the finished white, not a base coat. That way, once the coral went on, there was no need to go back and repaint the white stripes.
Materials Used
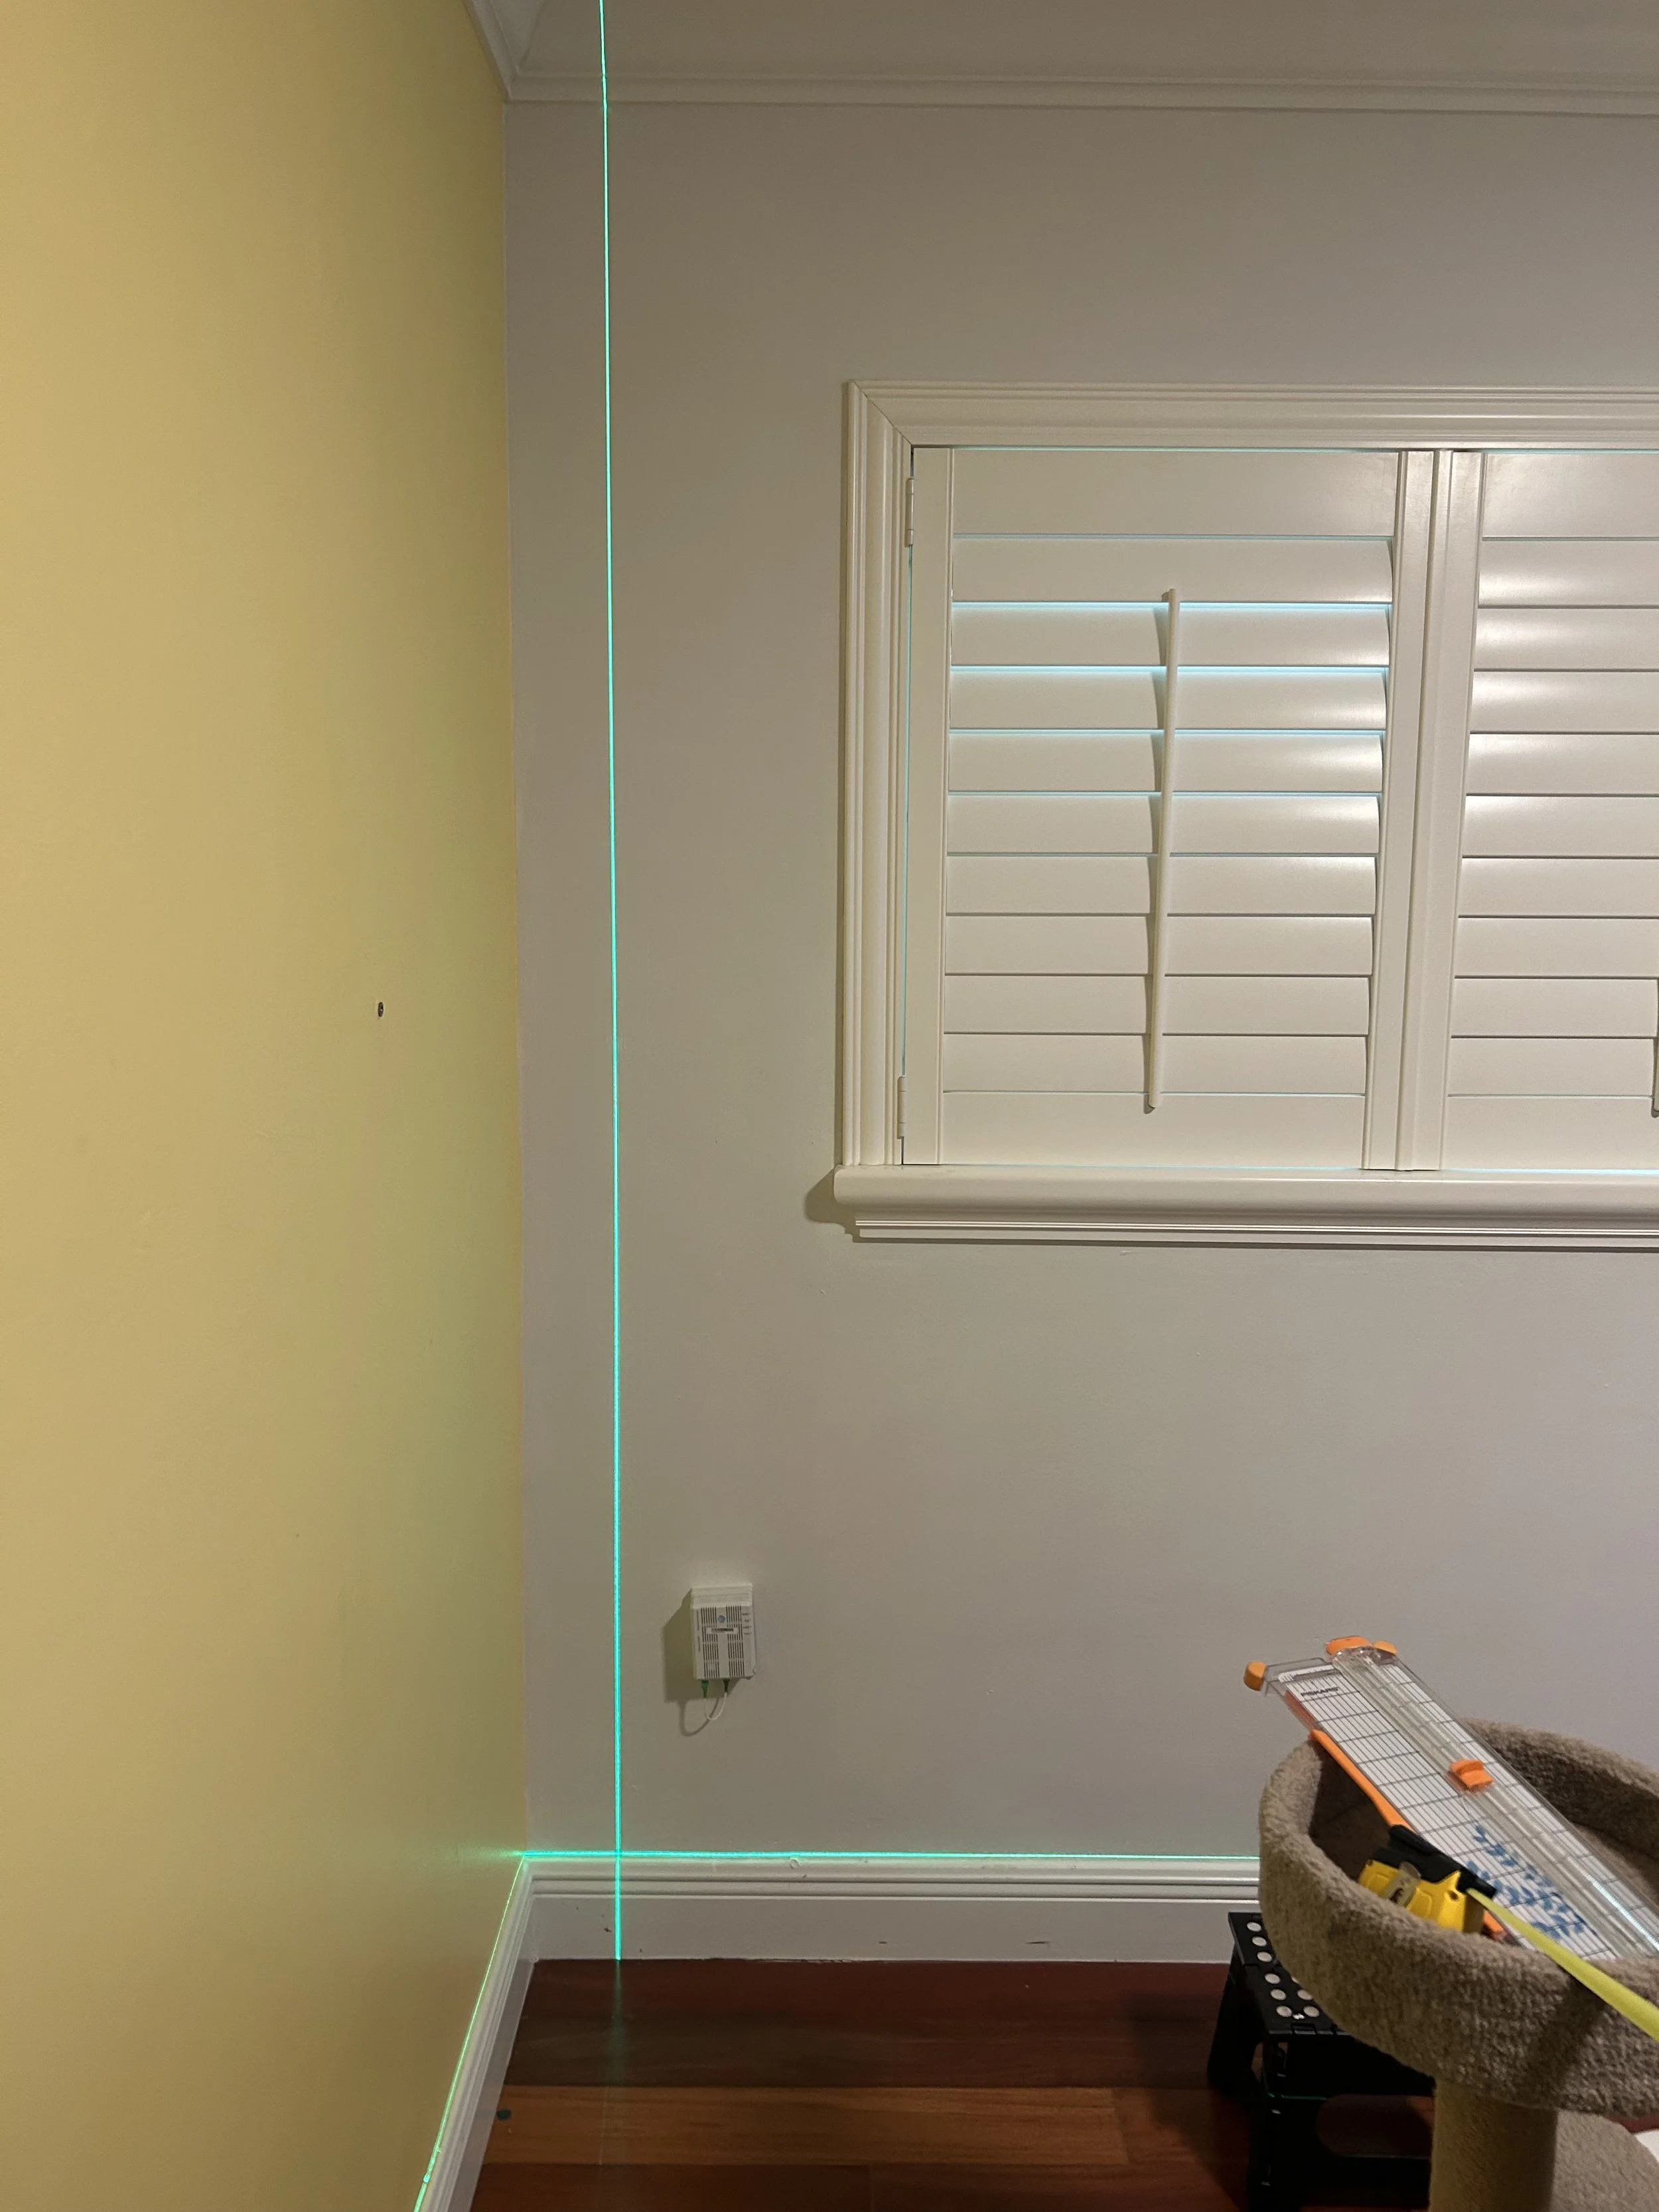
Laser level
Do not attempt this without one. This is a complete game changer. It removes guesswork and is the difference between stripes that feel intentional and stripes that feel slightly off.Measuring tape and pencil
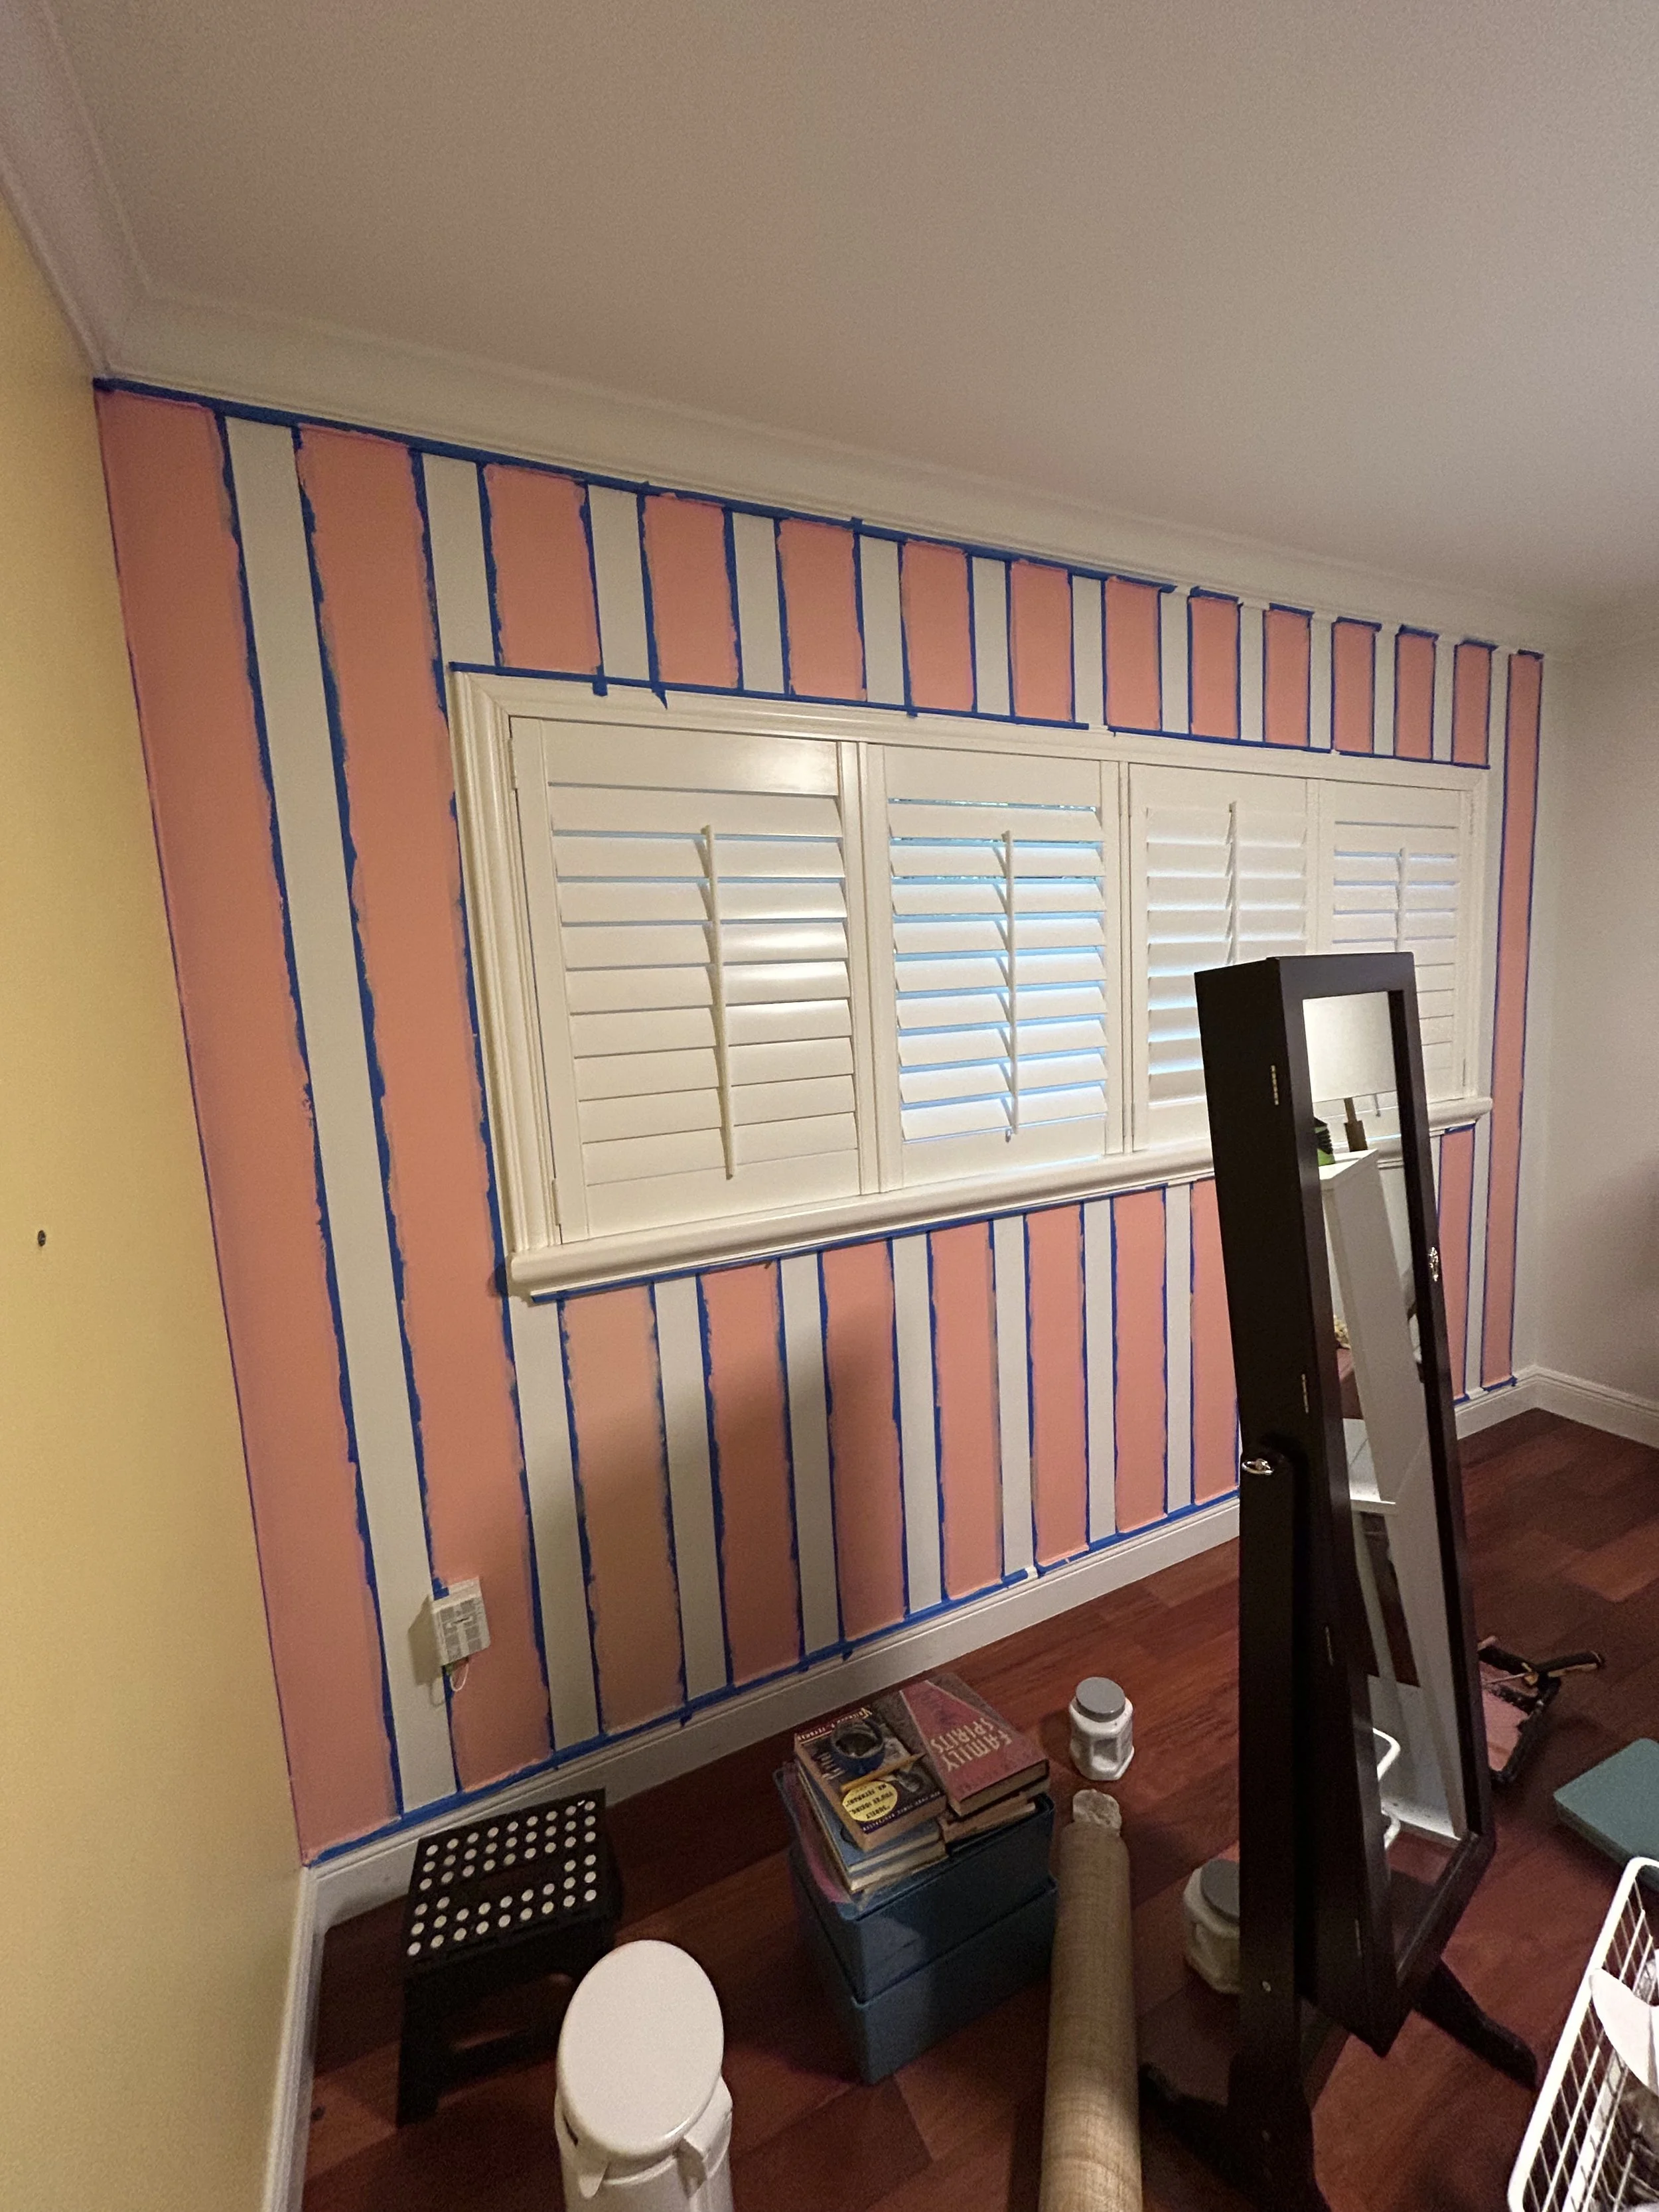
Used to mark the five-inch intervals.Blue painter’s tape
This tape held clean lines and removed easily without damaging the paint.Felt-edged smoothing tool
I used the felt-edged smoothing tool from this wallpaper hanging kit to burnish the tape before painting. The felt ensures you can press the tape down firmly without ripping it or damaging the wall. I will also be using this kit in the wallpaper post.Paint roller and tray
Step-by-Step: How I Painted the Stripes
Step 1: Measure and Mark
Using a measuring tape, I marked the wall every five inches with a pencil. These marks served as reference points for where each stripe would begin.
Step 2: Set the Laser Level and Tape
I aligned the laser level directly on each pencil mark and ran painter’s tape along the laser line.
Because the white paint was already the finished white, I taped on the side of the line that needed to stay white. The exposed section was what would be painted coral.
Step 3: Burnish the Tape
Before painting, I burnished every tape edge using the felt-edged smoothing tool that came in this wallpaper kit. This step matters. It seals the tape and keeps the lines crisp.
Do not skip this.
Step 4: Paint
I applied two coats of the coral paint using a roller. Coverage was even and forgiving. I waited about an hour between coats.
Painting itself is easy. Taping is where the time goes.
Step 5: Remove the Tape
Once the second coat was set but not fully cured, I carefully removed the tape. The lines came out clean and sharp.
Time Commitment
This is realistically a two-day project.
Most of the time is spent measuring and taping. The actual painting moves quickly once everything is prepped.
Leveling Tip
If your stripes start to look slightly slanted, pause and reset the laser level. Make sure it is sitting on a stable surface and fully leveled before continuing. Small errors compound quickly with stripes, so catching them early makes a big difference.
Final Thoughts
Cabana stripes add character and intention in a way plain paint does not. They make the room feel layered, considered, and complete.
They also look like far more work than they actually are. With the right tools and a little patience, this is a project that is very doable and absolutely worth the effort.
Project Costs
Sherwin-Williams paint (1 quart, Youthful Coral): $25
Laser level: $29.99
Felt-edged smoothing tool (from wallpaper kit): $5.99
Blue painter’s tape: $6.97